
How to Deep Clean an Engine Bay
Transform a greasy, dusty engine bay into showroom condition using targeted degreaser, detail brushes, gentle rinsing, and a long-lasting plastic protectant.
Cool the engine, cover sensitive electronics and intake areas, apply a suitable degreaser, agitate with soft brushes, rinse gently with low pressure, then dry and inspect before restarting.
Watch: How to Deep Clean an Engine Bay
Cover the electrics, degrease, agitate, rinse with care, and finish the plastics and metal. · 4:07 minute walkthrough. The full written steps are below.
Protect the electrics before the water
Engine bays get dirty, but they also contain sensitive connectors, intakes and electronics. The safe cleaning method is about what you cover and how gently you rinse.
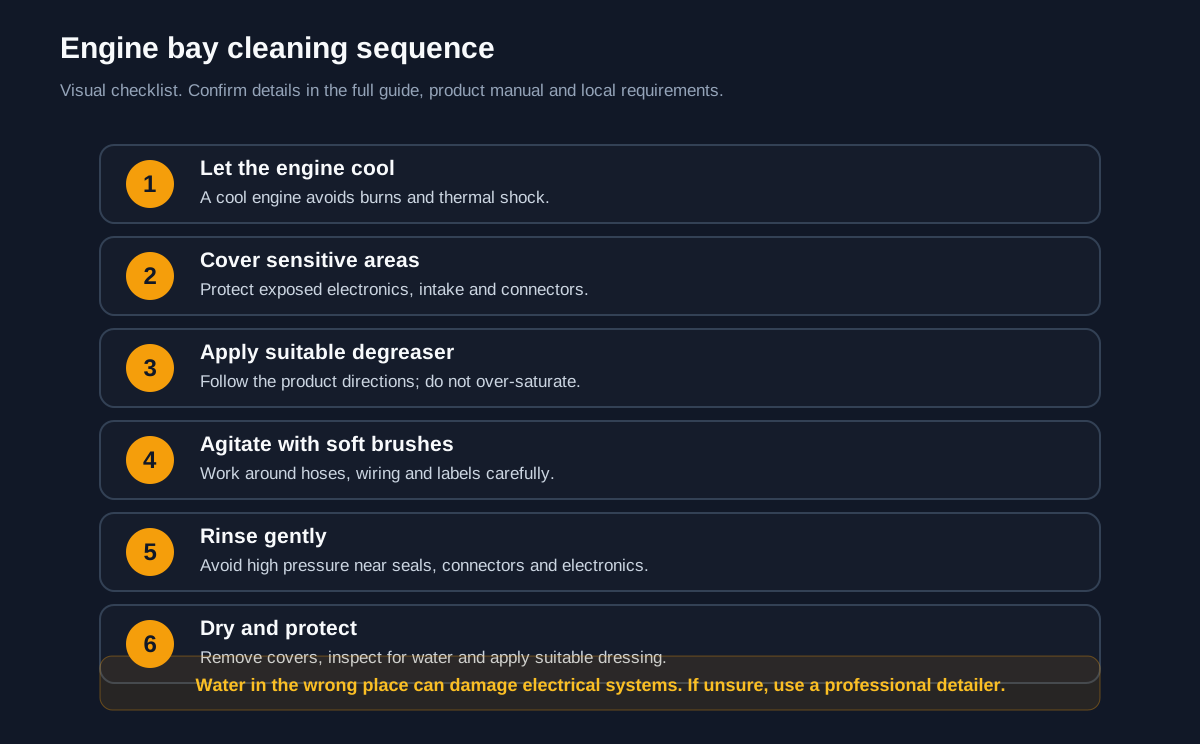
Before you start
- Let the engine cool until it is safe to touch.
- Cover exposed electronics, intake and connections.
- Use a suitable degreaser and soft brushes.
- Rinse gently and avoid seals, connectors and labels.
Common failure points
- High-pressure water can force water into connectors.
- Never spray a hot engine.
- If the vehicle runs poorly afterward, stop and get help.
Watch the original demonstration
See the source video before you start, then use the step checkpoints below as your field guide.
Play source video on YouTubeKeep learning
- Clean the Interior DashboardFinish the vehicle detail inside.
- Deep Clean Car CarpetsContinue the full vehicle cleanup.
- Clean a Foam Air FilterRelated engine-maintenance task.
Visual step map
See the full sequence before you start, then check off each step as you go.
0 of 7 steps checked
Materials and cost planner
Select the items you plan to buy, adjust any estimated price, and calculate the selected total.
Editable rough U.S. retail estimates. Estimated all listed: $113.00. Prices are planning estimates, not quotes — tax, store, brand, size and quantity will change them.
Time and finish planner
Estimate active working time from the number of steps in this guide.
Room surface area calculator
Estimate the wall, ceiling and floor area of a room for planning cleaning time and supplies.
Subtract large fixtures or appliances that will not be cleaned. Never mix cleaning chemicals unless the manufacturer explicitly says it is safe.
- Read the tools, materials, safety notes, and steps below for free.
- Tap See 20-second demo if you want to understand it first.
- Tap Start Camera Coach when you want hands-free help, or Voice-only if you do not want to use the camera.
- Allow camera and microphone. Point your phone at the work; the coach watches your progress and tells you the next step.
🧰 Required Tools & Equipment
- ✓ Garden hose with multi-pattern spray nozzle
- ✓ Assorted soft-bristle detailing brushes
- ✓ Stiff nylon brush
- ✓ Microfiber towels (pack of 6-8)
- ✓ Leaf blower or compressed air nozzle
- ✓ Spray bottle
📦 Materials & Supplies
- ✓ Automotive-safe degreaser or all-purpose cleaner (APC)
- ✓ Car wash soap
- ✓ Aluminum foil or plastic cling wrap
- ✓ Painter's tape
- ✓ Water-based vinyl, rubber, and plastic protectant
⚠️ Safety Checkpoints & Warnings
- • Ensure the engine is completely cold to the touch to prevent thermal shock to metal castings and chemical vaporization.
- • Disconnect the negative battery terminal to eliminate short-circuit risks during the wet cleaning process.
- • Do not use high-pressure power washers directly against wiring looms, fuse boxes, alternator vents, or intake sensors.
📋 Step-by-Step Guide (7 Steps)
Prep the Bay and Water-Shield Electronics
Disconnect the negative battery terminal and tuck the cable aside safely. Wrap sheets of aluminum foil snugly around sensitive electrical parts, including the alternator, exposed fuse box, aftermarket open-air intake filter, and ECU connectors. Aluminum foil molds to irregular shapes much faster and tighter than plastic wrap without needing tape.
- • Negative terminal completely detached from battery post.
- • Alternator, exposed filters, and major wiring junctions fully shielded in molded foil.
- • Leaving open air cone filters exposed to moisture.
- • Using tape directly on warm hoses or leaving adhesive residue on plastic covers.
Dry Debris Sweep and Hood Underside Pre-Clean
Use a leaf blower or compressed air to blast out loose pine needles, dried leaves, and road grit trapped in the hood cowl and corner wells. Spray the underside of the open hood with car wash soap solution and wipe it down with a damp microfiber cloth to avoid dripping grit onto the clean engine later.
- • Hood latch area and wiper cowl free of leaves and loose sediment.
- • Underside of the hood wiped clean and dry.
- • Wetting the engine bay before blowing out loose leaves, which creates stubborn sludge in cowl drains.
Apply Degreaser and Pre-Soak Grime
Mist the entire engine bay lightly using the 'shower' or 'mist' setting on your hose nozzle to lubricate the surfaces. Liberally spray automotive degreaser onto heavy grease zones, metal bracketry, fluid reservoirs, and plastic engine covers. Let the chemical dwell for 3 to 5 minutes to break down built-up road film and baked-on oil without letting it dry out.
- • Engine bay surfaces uniformly coated in foaming degreaser.
- • Grease deposits beginning to emulsify and run downward.
- • Allowing degreaser to dry completely on painted metal or raw aluminum, causing staining.
- • Using a high-pressure jet stream instead of a gentle mist.
Agitate Dirt with Detailing Brushes
Work top to bottom using soft-bristle detailing brushes to work the degreaser into foam across all textured plastic covers, wire looms, and radiator hoses. Use a smaller, stiff nylon brush for tight metal brackets, alternator casings, and intake manifold crevices. Dip your brushes frequently into a bucket of warm soapy car wash water to lift and carry away loosened grit.
- • All textured surfaces covered in brown/gray agitated lather.
- • Black plastic covers and rubber hoses showing their original base color beneath the foam.
- • Scrubbing painted fenders with stiff-bristle brushes, creating swirl marks.
- • Skipping hard-to-reach crevices around bolt heads and fluid caps.
Gentle Rinse Down
Set your hose nozzle strictly to a gentle 'shower' pattern and rinse the entire bay from back to front, top to bottom. Sweep the water stream continuously across surfaces without holding it fixed over any single connector or electronic housing. Keep rinsing until all traces of degreaser foam and lifted sediment are completely washed down the floor.
- • No chemical suds or surfactant bubbles remaining in recessed bolt pockets.
- • Water running clear off the engine undertray or pavement below.
- • Shooting direct high-pressure water streams into the alternator or spark plug wells.
- • Rinsing from bottom to top, which splashes dirty runoff onto cleaned upper panels.
Force-Dry Cavities and Remove Foil Shields
Use a leaf blower or compressed air to force pooled water out of spark plug recesses, alternator vents, bolt heads, and electrical plugs. Carefully peel off all aluminum foil covers and inspect the shielded components to ensure they stayed dry. Follow up immediately by wiping down all accessible hoses, intake tubes, and painted frame rails with dry microfiber towels.
- • No standing water puddles in spark plug galleys or manifold pockets.
- • All protective foil removed and accounted for.
- • Surfaces bone-dry to the touch.
- • Leaving foil caps forgotten over the alternator or intake before starting the engine.
- • Allowing standing water to sit in electrical plug wells.
Apply Dressing and Reconnect Battery
Spray a water-based plastic and rubber protectant generously over all black plastic covers, rubber hoses, and cowl trim. Let the dressing penetrate for 5 to 10 minutes, then buff off all excess product with a fresh microfiber towel to leave a rich, satin, non-sticky OEM finish. Reconnect and tighten the negative battery terminal clamp securely.
- • Plastics and hoses exhibit a deep satin black sheen without a greasy or slick residue.
- • Battery terminal securely bolted down and vehicle starts smoothly.
- • Using petroleum-based or silicone dressings that attract dust and degrade rubber over time.
- • Applying protectant onto drive belts or pulleys, which can cause slipping.
Credit: inspired by an original tutorial by ChrisFix — watch the original on YouTube.
Don’t have everything?
- No Leaf blower / Compressed air? Shop vac on exhaust mode or a hair dryer set strictly to cool
- No Automotive detailing brushes? 1-inch soft synthetic paintbrushes or clean, soft-bristle toothbrushes
- No Dedicated engine degreaser? Diluted all-purpose cleaner (APC) or grease-cutting dish soap in a spray bottle
- No Engine dressing protectant? Water-based interior/exterior vinyl and rubber protectant
Frequently asked questions
Can I pressure wash an engine bay?
Avoid high pressure near connectors, seals, the intake and electronic components. Water forced into the wrong place can cause expensive damage.
Should the engine be hot when cleaning?
No. Let the engine cool until it is safe to touch. A hot engine increases burn risk and thermal shock.
What should I cover before cleaning?
Protect exposed electronics, fuse boxes, connectors and the air intake. Check the vehicle manual for model-specific precautions.
The car runs poorly after cleaning. What should I do?
Stop driving if performance is rough or warning lights appear. Water may have entered a connector or intake area; get the vehicle inspected.